We are using a virtual conference platform for this conference. This guide provides you with information about how to access the platform and upload your flash-talk and/or poster to your poster booth.
STEP 1: Accessing your poster booth
- You will receive an email inviting you to join the platform with the access link.
- Sign-in with the email address (1) you used to register for the conference.
- If you are joining the platform for the first time, you will be prompted to set-up your password at the first log-in. Please remember it as you will need it to access the platform in the future.

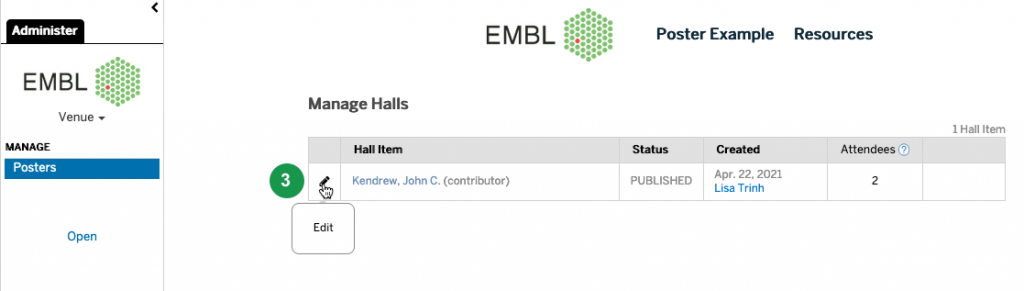
- To access your poster booth, click on “Posters” (2) in the “MANAGE” menu on the left-hand side.

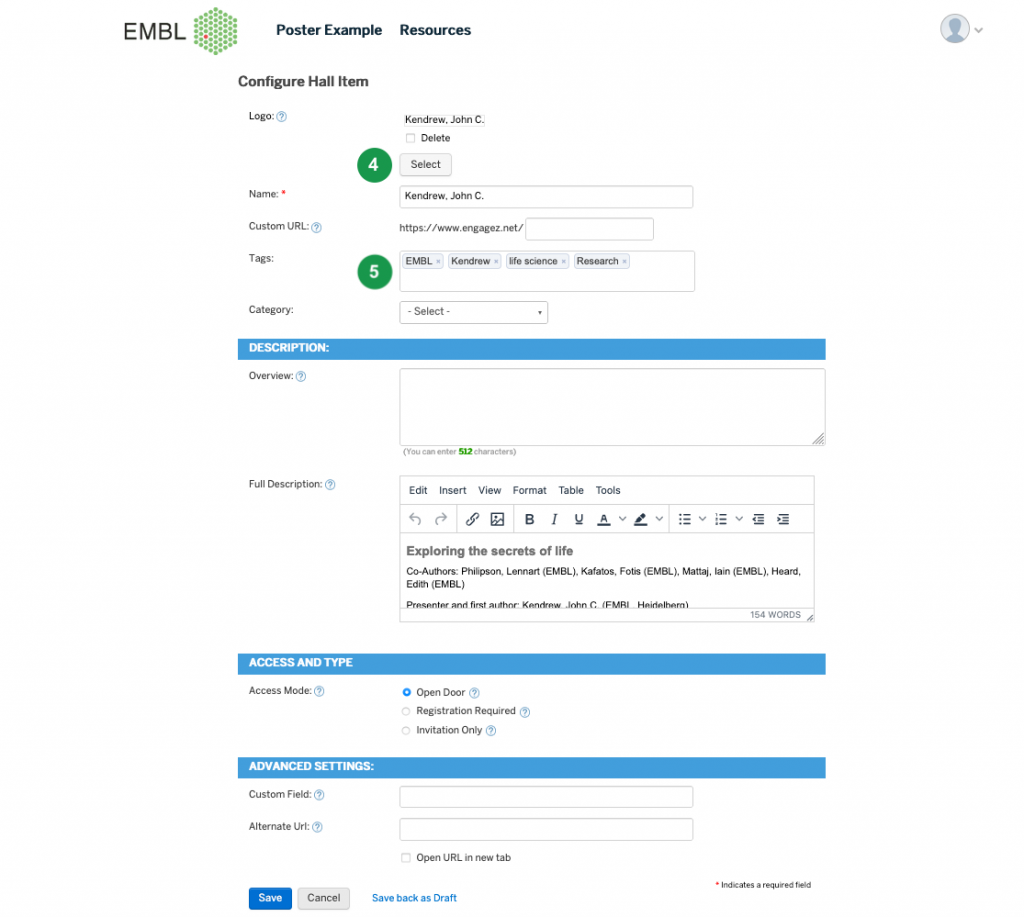
STEP 2: Adding a thumbnail image and tags to your poster booth
| 💡 | Tips: Add a thumbnail to your poster booth to make it more eye-catching. The thumbnail image should be 195 x 65 px (width x height) and in JPG or PNG format. |
| Include tags in your poster booth to improve its searchability across the virtual conference venue. You can use either singular words or word combinations. If you want to add several tags, you need to delimit them by comma. |
- Click on pen icon next to your poster title (3).
- To add a thumbnail image, click on “Select” (4) next to “Logo”. Upload the image from your computer and insert it.
- In the field next to “Tags” (5) enter your keywords or word combinations delimited by comma.
Please do not make and other changes!
STEP 3: Adding files to your poster booth
| 💡 | Tip: We recommend uploading a 2-minute flash talk video and/or an overview poster to your poster booth to promote your poster presentation. The video or poster file highlights the key points without including sensitive data. Leaving your full poster, with a comprehensive explanation of your research and data, to be presented by you during the live poster session. You have the possibility to upload MP4 videos (up to 8 MB), PDF files and JPG or PNG images (up to 2 MB), links or embedded HTML. Get creative in making your poster booth stand out! |
| For the poster file: | |
| ❗️ | Be mindful of the data you upload to the poster booth. We suggest saving sensitive data for sharing during your live poster presentation. You can use sensitive data during your live poster presentation. Although we do what is in our capacity to limit unsolicited download and distribution of the scientific data, keep in mind that current technical advancements make it impossible to entirely prevent PDF or image download. |
- Click on “Resources” (6) in the “MANAGE” menu in the left-hand side.
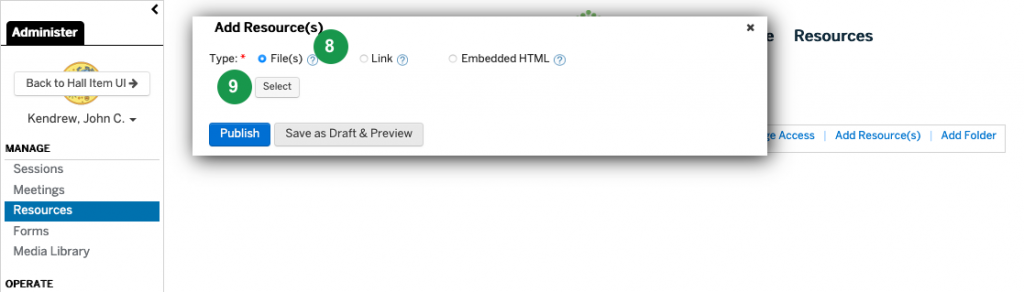
- In “Manage Resources” page that appears, click on “Add Resource(s)” (7).

- In the pop-up window, select “File(s)” (8), then click on the “Select” (9) button.
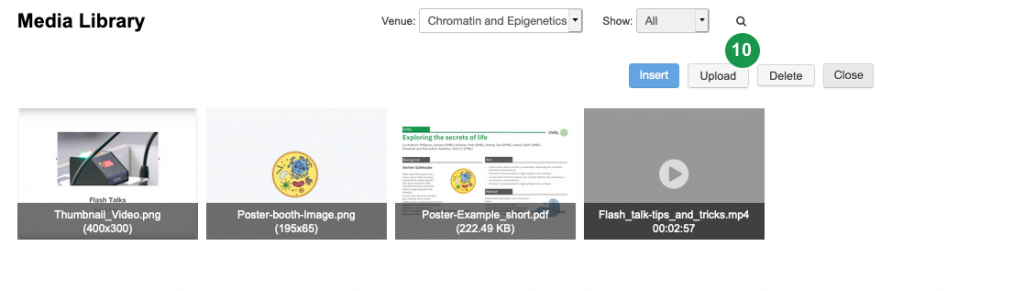
- The “Media Library” window will open. Click the “Upload” (10) button to start adding your files and proceed to select the files to upload. Files that you upload will be saved to the Media Gallery.
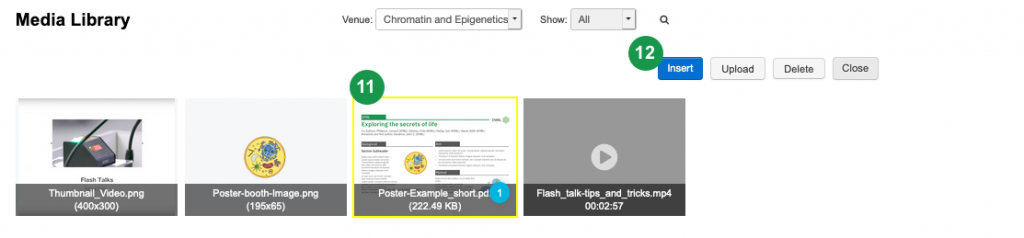
- To add the uploaded files to your poster booth, click on the items you wish to add – a yellow border will show when you do this (11) – and then click “Insert” (12).
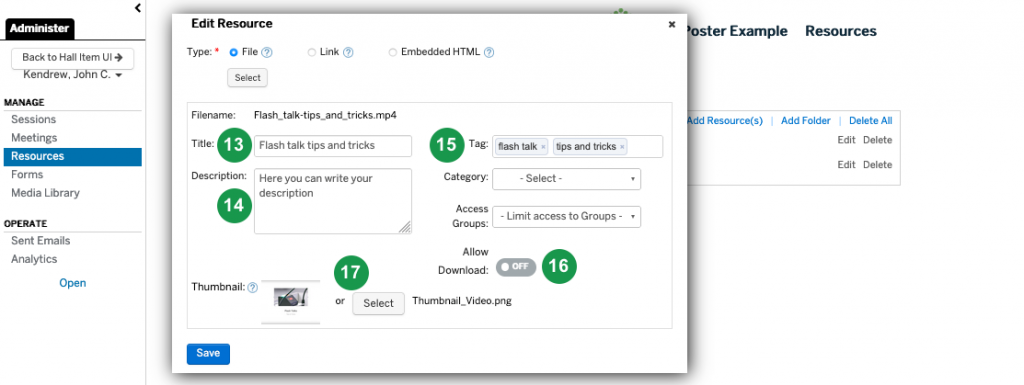
- For each uploaded Resource item, you are able to:
“Title” (13): Write the title of your resource (flash talk, poster, etc.)
“Description” (14): Add a description
“Tag” (15): Add keywords as tags to improve searchability
“Allow Download” (16): Disable download of materials. Please ensure that you change the download button to “OFF” unless you are willing for people to download your poster materials.
“Thumbnail” (17): Add or change the thumbnail
When uploading files containing sensitive information, bear in mind that some PDF viewers enable file download regardless of the settings of the Resource item in the platform and screenshots can be taken.
STEP 4: Recording a 2-minutes flash-talk
As mentioned in STEP 3, we recommend uploading a 2-minute flash talk video or an overview poster to your poster booth to promote your poster presentation.
If you would like to include a flash talk, follow the steps below to record the video file and then upload it as a Resource to your poster booth:
- Download the Zoom app: https://zoom.us/download.
- Sign In (If you don’t have an account, you will have to create one for free).
- Once you have successfully signed in, click “New meeting”.
- Join with Computer Audio and Camera (you should see yourself and see microphone indicator flashing green when speaking).
- Click “Share screen” in the Zoom App and select “Desktop 1” where your presentation is (make sure you don’t have any additional screens connected).
- Click “Record”.
- Deliver your flash talk. A good length is 2 minutes in duration.
- When done, end the recording and stop screen sharing.
- Your recording will be finalised once you end the Zoom meeting.
- The folder where the recording (MP4-file) was saved will automatically open.
- Upload by following the instructions in STEP 3: Adding files to your booth.
| 💡 | The file size of your video should not exceed 8 MB. If it is larger, you can use YouTube to reduce the file size. For this, simply upload the video file into YouTube, then downloading it again. The downloaded version will usually be smaller than the original file. |
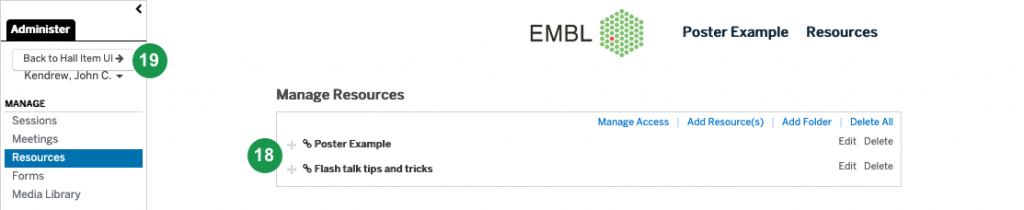
Step 5: Organising your poster booth
Under “Manage Resources”, you can reorder the items you have inserted by clicking the cross on the left of the file and using drag and drop (18), edit or delete them.
Keep adding Resource items to your poster booth and ordering the way you want them to appear until you are finished and your booth is complete! You can see how your Resource items appear to conference participants by clicking on “Back to Hall Item UI” (19).